 |
Stained Glass Cookies Recipe
Total time: more than 2 hours
Preheat the oven to 180°C / 350°F
Prep. time: 20 minutes
Refrigeration time: At least 2 hours
Bakking time: 12 minutes
Difficulty: Easy
Chef's Note
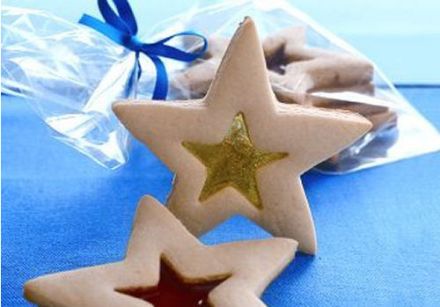
Christmas is a holiday for children. Have fun making these delightful Stained Glass Cookies with your kids. Place a ribbon through them so you can hang them on your Christmas tree... just don't be surprised if your decorations disappear!
Fun Idea
To make these cookies into decorations, use a drinking straw to poke a hold in the top of each cookie cutout. Bake and cool as directed. Decorate as desired and thread a piece of ribbon through the hole to use for hanging.
Cooking Know-How
Do not use mint flavored Lifesavers for these cookies. They do not melt the same way the other flavors do.
Ingredients
For 42 cookies
- 125 ml (1/2 cup) softened butter
- 125 ml (1/2 cup) sugar
- 125 ml (1/2 cup) honey
- 1 egg
- 1 tsp. vanilla
- 750 ml (3 cups) flour
- 1 tsp. baking powder
- 1 tsp. baking soda
- 1/2 tsp. salt
- 5 rolls (25 g each) Life Savers candies, any color
Method
- Beat butter, sugar, honey, egg and vanilla in large bowl with electric mixer on medium speed until well blended. Add flour, baking powder, baking soda and salt; mix well. Cover. Refrigerate at least 2 hours.
- Preheat oven to 180° C (350° F). Roll out dough on lightly floured surface to 1/4-inch thickness.
- Cut into desired shapes with 2-1/2- to 3-inch floured cookie cutters. Trace smaller version of cookie shape on dough, leaving 1/2- to 3/4-inch border of dough. Cut out and remove dough from centre of each shape; set aside.
- Place cutouts on foil-lined baking sheets. Shape removed dough centres into ball; re-roll to make additional cutouts.
- Crush each colour of candy separately between 2 layers of wax paper with mallet; spoon into centres of cutouts.
- Bake 6 to 8 minutes or until candy is melted and cookies are lightly browned. Let the cookies cool completely before removing them from the aluminum foil so that they'll come off easily.
More recipe ideas

©Copyright MSCOMM 1996 – 2026. Michèle Serre, Éditeur
-

 Recipes
-

 Products
-

 Entertaining
-

 Chefs
Chefs
-

 Hints & Tips
-

 Glossaries